As I slowly move through my lead pile of things Home Guard related, the realization set in that I would need terrain and a fair bit of it if I wanted to replicate
Dad's Army,
Went the Day Well or The
Eagle Has Landed. I toyed with making up buildings out of foam core and other materials but practically, that wasn't a realistic option. With some Christmas money in hand, I went shopping. There are many good manufacturers out there with some very nice products in 28mm / 1/56. Some of the resin offerings were beautiful but expensive, and for many companies, their UK styled offerings were focused on terraced housing.
I decided to go with Sarissa primarily because of their very generous shipping terms and because they ship Royal Mail. (As mentioned in a previous post, courier companies like to gouge Canadians for customs fees). The order was placed and a few weeks later, my order arrived in my mailbox. It came in two separate packages, both properly marked as to contents and value and with no import fees payable - a double bonus.
First up is the
L016 Stone Cottage. This is a pretty little kit with double walls allowing for the outer wall to lean in - see below and for prototypically thick windows and doors. The interior fireplace and flagged floor was an unexpected add on. A reasonable amount of stone detail is laser etched into the MDF but the effect was still too flat for my liking. At various points in the assembly, I used my Dremel tool to deepen the lines and add more texture. The material used by Sarissa is thick enough and robust enough that I was able to significantly improve the appearance especially around the chimney. I used a very small ball cutter to deepen the lines, followed by a grinding point to round the edges and a wire wheel to soften the effect over all. As always when working on MDF, proper breathing protection against the dust is a must.
 |
| Godwin's Cottage |
 |
| End view |
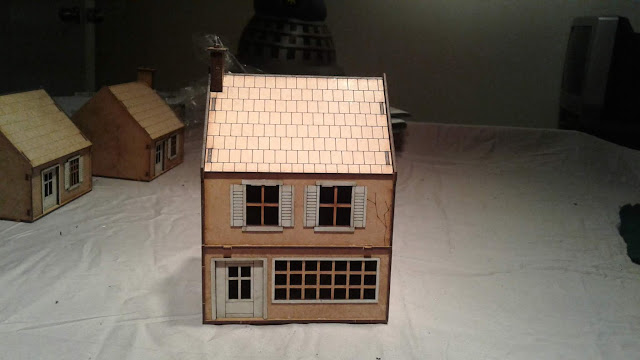
Next is the
N005 Small Shop. A basic two level building with removable roof and first floor, it is a great addition to the high street.
 |
| Sinistre and Sons Dry Goods |
The astute among you will notice that the front door and and window are reversed compared to the official version shown in the link above. This was intentional. Sarissa uses several standard sized components across different models in their ranges. On opening the shop flat pack, I was delighted to see that it included a wall section with a rather pretty arched door and window. Rather than use this at the back of the shop, I swapped it out with a standard wall and window section from the one of the single story houses below. To keep the front and back doors in opposing corners, I reversed the shop window and put the door on the left. I like that the replacement wall gives a barred window effect for what would be the shop stock room.
 |
| Anti-theft protection around the back |
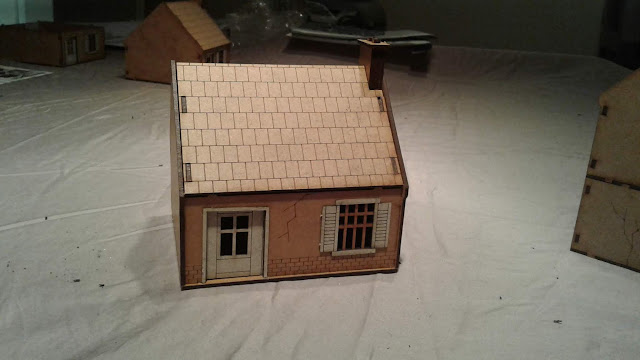
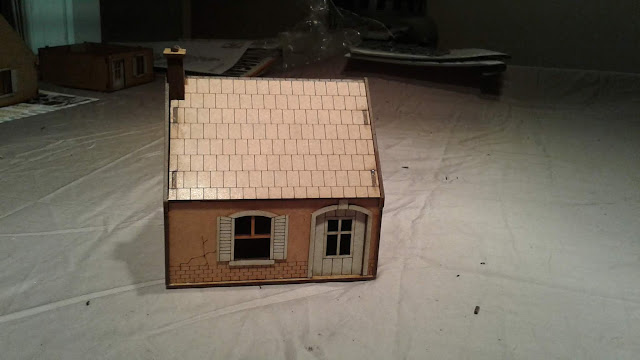
Which brings us to a pair of
N021 Single Story Houses. First is the stock version:
 |
| Foxglove Cottage |
A simple little building that will make a good hiding place for a Vickers or an angry housewife with a brace of Molotovs. And the modified version:
 |
| The Irises |
Swapping the walls gives me two versions of the same building while breaking up some of the same-iness common to MDF structures.
Last of the buildings is the
N009 Small House. Another functional building that will blend in on the high street or act alone as a larger farmhouse.
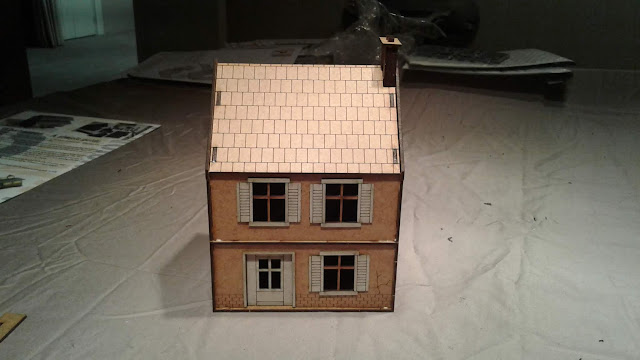 |
| Biggles' Farm |
The last piece from Sarissa is the
N048 Stone Bridge - Double Arch shown here with a Die Waffenkammer
Neubaufahrzeug on its way to put the jackboot to an unsuspecting bucolic English village.
 |
| Bloodnok Bridge |
It comes in several versions with up to three arches. I went with the double arch version for maximum flexibility. The ends and middle seem to be very stable as is, but I may add rare earth magnets to lock them together if required. Size wise it is probably a little over scale width, but that is a positive for us wargamers.
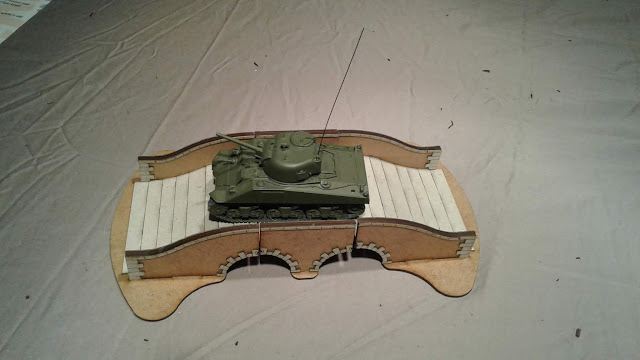 |
| With Warlord Sherman |
The Sarissa products are quite a bit smaller than my
Charlie Foxtrot pub but I don't think that will be a problem. The pub is a large piece for any table.
 |
| The Pub Next Door |
Laid out, I think I now have enough buildings for a rather exciting urban fight.
 |
| We are the only Germans in the Village! |
Overall, I am happy with the results. The price was good and I was able to get some extra variety out of my purchase. There is a lot more work to do on painting, finishing and the roofs, but they're fine for play testing scenarios as is.


